How to Make an AI Music Video in 2026
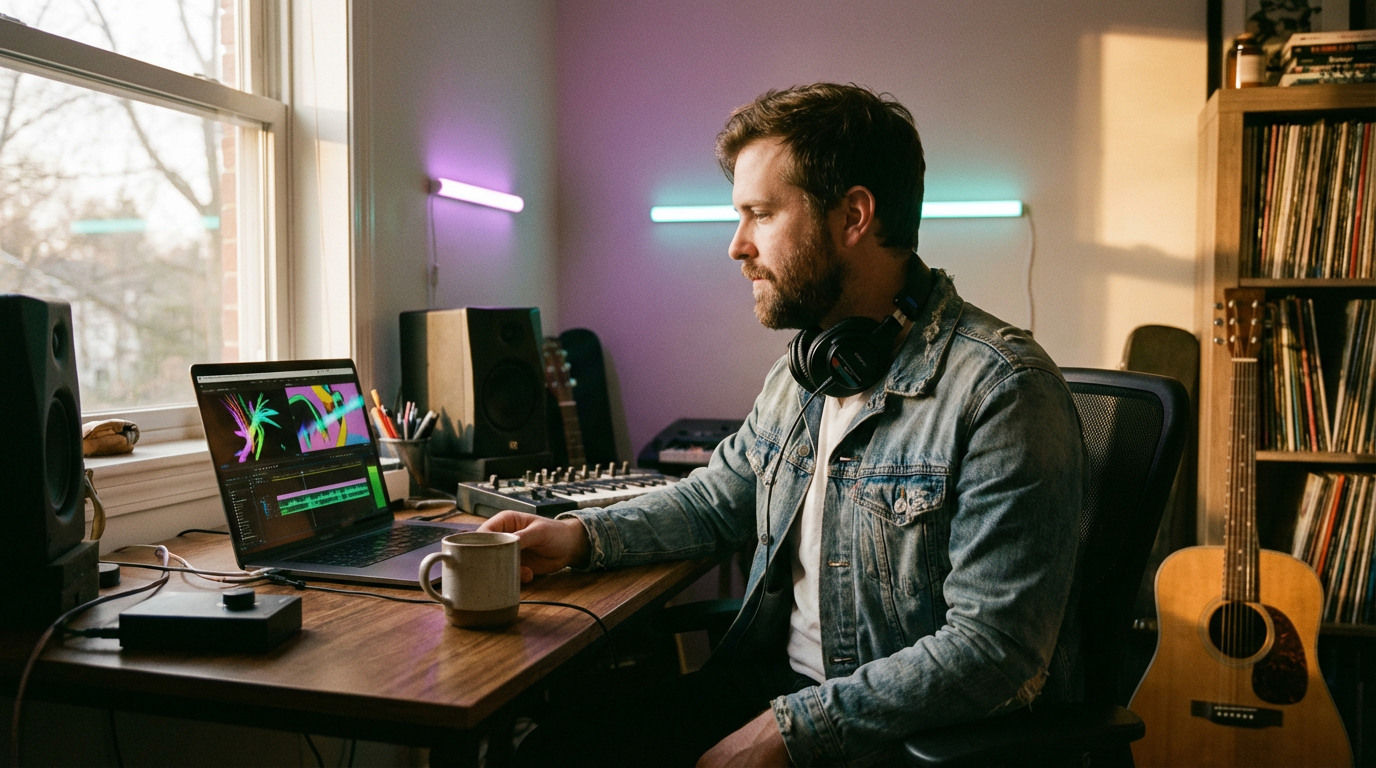
You have a track. Maybe you produced it in your bedroom. Maybe you created it with Suno or Udio. Either way, your music deserves visuals — and in 2026, you don’t need a film crew, a $10,000 budget, or weeks of editing to get them.
AI music video generators have evolved from novelty toys into legitimate creative tools. By 2026, AI music video creation has evolved into a streamlined process where musicians, content creators, and digital artists can produce professional-grade visuals synchronized with custom soundtracks using artificial intelligence.
Traditional video production workflows — storyboarding, shooting, and editing — used to take weeks. AI compresses these timelines into hours by automating sound generation, video editing, and synchronization.
In this guide, you’ll learn how to go from a finished audio track to a polished, platform-ready music video — step by step. Whether you’re releasing your first single or your fiftieth, you’ll walk away with a video you’re genuinely proud of.
Here’s what we’ll cover:
- Choosing the right AI video tool for your needs
- Preparing your music file for the best results
- Defining your visual style and art direction
- Generating your video with OneMoreShot.ai
- Editing and refining for a professional finish
- Exporting for YouTube, TikTok, Instagram Reels, and Spotify Canvas
- Pro tips that separate great videos from forgettable ones
Let’s make something incredible.
What You’ll Need
Before you dive in, gather these essentials:
- Your finished track — a mastered (or near-final) audio file
- A computer or smartphone — all the tools we’ll use are browser-based or mobile-friendly
- Your creative vision — even a rough idea of what you want visually
- 15–30 minutes — that’s genuinely all it takes
Audio File Formats
OneMoreShot.ai supports all major audio formats including MP3, WAV, FLAC, AAC, and OGG.
You can also paste a link to your track from platforms like Suno, Udio, or YouTube.
That said, here’s my recommendation: upload WAV or FLAC when possible. Lossless audio gives AI tools more data to analyze, which means better beat detection and tighter visual synchronization. MP3 at 320 kbps is also perfectly fine.
Quick Checklist
| Item | Details |
|---|---|
| Audio format | WAV, FLAC, MP3 (320 kbps), AAC, or OGG |
| Track length | Any length works; 2–5 minutes is ideal |
| Lyrics (optional) | Have them ready for lyric videos or lip-sync features |
| Reference images | 2–3 images that capture your desired visual mood |
| Budget | Free tiers available; paid plans unlock full videos |
Step 1: Choose Your AI Video Tool
The AI music video space has exploded. Here’s a quick look at the major players in 2026, so you know what’s out there — and why we’ll be using OneMoreShot.ai for this walkthrough.
Quick Comparison
| Tool | Best For | Beat Sync | Lip-Sync | Multi-Format Export |
|---|---|---|---|---|
| OneMoreShot.ai | Full music videos with creative control | ✅ | ✅ Advanced | ✅ Vertical, horizontal, square |
| Neural Frames | Audio-reactive visualizers | ✅ | ❌ | ✅ |
| Freebeat | Dance & performance videos | ✅ | ✅ | ✅ |
| Revid AI | Quick social media clips | ✅ | ❌ | ✅ |
| LTX Studio | Script-to-screen storytelling | ✅ | ❌ | ✅ |
Why OneMoreShot.ai?
For this tutorial, we’ll use OneMoreShot.ai for a few specific reasons:
-
Music-first workflow: The AI processes your track and creates synchronized visuals instantly. Advanced AI analyzes your music’s rhythm, tempo, and mood to create visuals that perfectly match every beat.
-
Two creation modes: You can choose between fully automatic video generation or build your video scene by scene. This means beginners can get a polished result in minutes, while experienced creators can fine-tune every frame.
-
Industry-leading lip-sync: OneMoreShot features the most advanced lip-syncing technology available on the market, with cutting-edge AI that delivers perfect mouth movement synchronization with unmatched precision.
-
Multi-format export: You can export in vertical, horizontal, or square formats — perfect for TikTok, YouTube, Instagram, and more.
-
Latest AI models: Sora 2 is now available in One More Shot AI , along with Seedance 4.5 and Nano Banana Pro.
💡 New to AI music videos? Start with our Complete Guide to AI Music Videos in 2026 for a broader overview of the landscape.
Step 2: Prepare Your Music
Great AI music videos start with well-prepared audio. This step takes 5 minutes and dramatically improves your results.
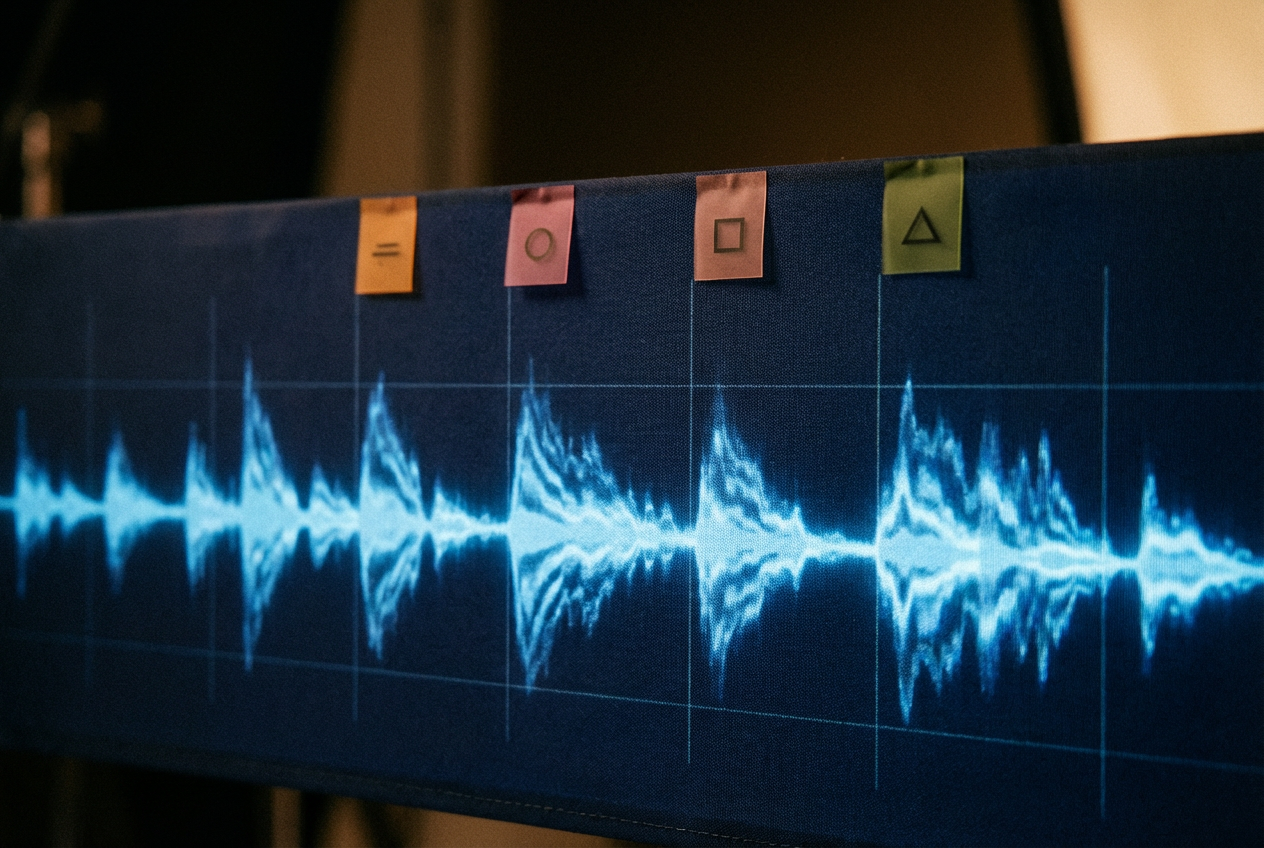
Analyze Your Track’s BPM
Knowing your track’s tempo (BPM) helps you make smarter decisions about visual pacing. While OneMoreShot.ai automatically analyzes your audio, understanding your BPM in advance helps you plan your creative direction.
Free AI-powered audio analyzers like Soundplate let you find the key, BPM (tempo), bitrate, sample rate and more of any song or loop. Other excellent free options include Tunebat, where you can find the key and BPM of any song by uploading your music for quick results.
Why BPM matters for your video:
| BPM Range | Feel | Visual Approach |
|---|---|---|
| 60–80 | Slow, emotional | Longer shots, smooth pans, atmospheric lighting |
| 80–110 | Mid-tempo, groovy | Mix of slow pans and rhythmic cuts |
| 110–130 | Upbeat, danceable | Beat-synced cuts, dynamic camera moves |
| 130–160 | High energy, EDM/drum & bass | Rapid transitions, intense visual effects |
| 160+ | Aggressive, fast | Quick cuts, strobing effects, maximum energy |
Identify Key Visual Moments
Listen to your track one more time with a notebook handy. Mark these moments:
- The intro (0:00–0:15): Sets the visual tone
- Verse-to-chorus transitions: These are where scene changes feel most natural
- The drop or hook: Your biggest visual moment — plan something striking
- The bridge: A chance for visual contrast or a shift in mood
- The outro: Where you’ll want a satisfying visual resolution
This “visual map” of your song will guide your prompts and scene planning in the next steps.
Audio Quality Checklist
Before uploading, make sure your track:
- ✅ Is properly mastered (balanced levels, no clipping)
- ✅ Has clean beginning and end (trim any silence)
- ✅ Is the final version (you don’t want to re-generate after tweaking the mix)
- ✅ Is in a high-quality format (WAV or FLAC preferred, 320 kbps MP3 minimum)
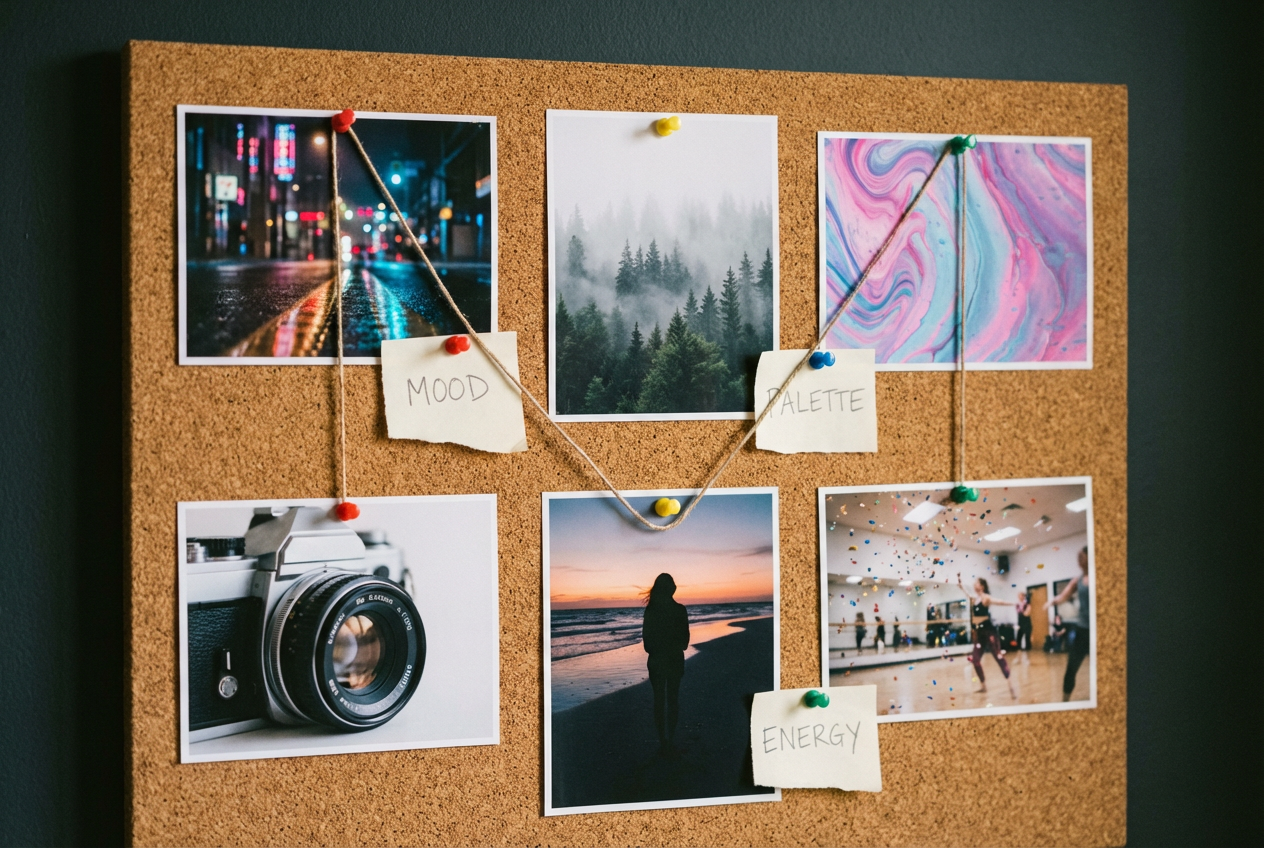
Step 3: Define Your Visual Style
This is where you become the creative director. Before generating anything, define the emotion and environment you want to convey. AI responds best to clear direction.
Choose Your Visual Approach
AI music video generators offer an incredible range of styles. Here are the most popular approaches in 2026:
Cinematic / Narrative — Tell a story with characters, settings, and plot progression. Works best for singer-songwriter, pop, and hip-hop tracks.
Abstract / Audio-Reactive — Let the visuals morph and pulse with the music. Perfect for electronic, ambient, and experimental genres.
Performance / Lip-Sync — Feature a virtual performer singing your track. Great for building an artist identity or persona.
Lyric Video — Animated text and visuals that showcase your lyrics. Ideal for first releases or promotional clips.
Hybrid — Combine elements from multiple approaches for a unique feel. For example, a narrative video with abstract transitions between scenes.
Gather Reference Images
Spend 5 minutes collecting 2–5 reference images that capture the feeling you want. Sources include:
- Pinterest — Search for terms like “cinematic neon city,” “dreamy forest aesthetic,” or “retro VHS vibes”
- Film stills — Screenshots from music videos or movies you admire
- AI art platforms — Browse communities on Midjourney or Stable Diffusion for inspiration
These references aren’t for copying — they’re for communicating your vision to the AI.
Master Your Prompts
The text prompts you write for each scene are the single most important factor in your video’s quality. Here’s a framework:
The SMEC Formula:
- Subject — Who or what is in the frame?
- Mood — What emotion should the viewer feel?
- Environment — Where is this scene set?
- Cinematography — What’s the camera doing?
Example prompts by genre:
Hip-Hop:
“A confident artist walking through rain-slicked city streets at night. Neon signs reflect off wet pavement. Moody, cinematic lighting. Slow tracking shot following the subject.”
Indie/Folk:
“A lone figure sitting on a dock overlooking a misty lake at sunrise. Warm golden light filtering through pine trees. Peaceful and introspective. Wide establishing shot.”
Electronic/EDM:
“Abstract geometric shapes pulsing and morphing in a dark void. Electric blue and magenta color palette. High-energy, futuristic atmosphere. Dynamic camera rotation.”
Pop:
“A vibrant performer dancing in a colorful studio with confetti falling. Bright, saturated colors. Joyful and energetic mood. Medium shot with slight zoom.”
🎯 Pro tip: Be specific. “A person in a city” will give you generic results. “A woman in a red leather jacket walking through a Tokyo alley lined with glowing vending machines at 2 AM” gives the AI something to work with.
Step 4: Generate Your Video with OneMoreShot.ai
This is where it all comes together. Let’s walk through the entire process.
Quick Generate Mode (The Fast Path)
If you want a complete video with minimal effort, Quick Generate is your friend.
4a. Upload Your Track
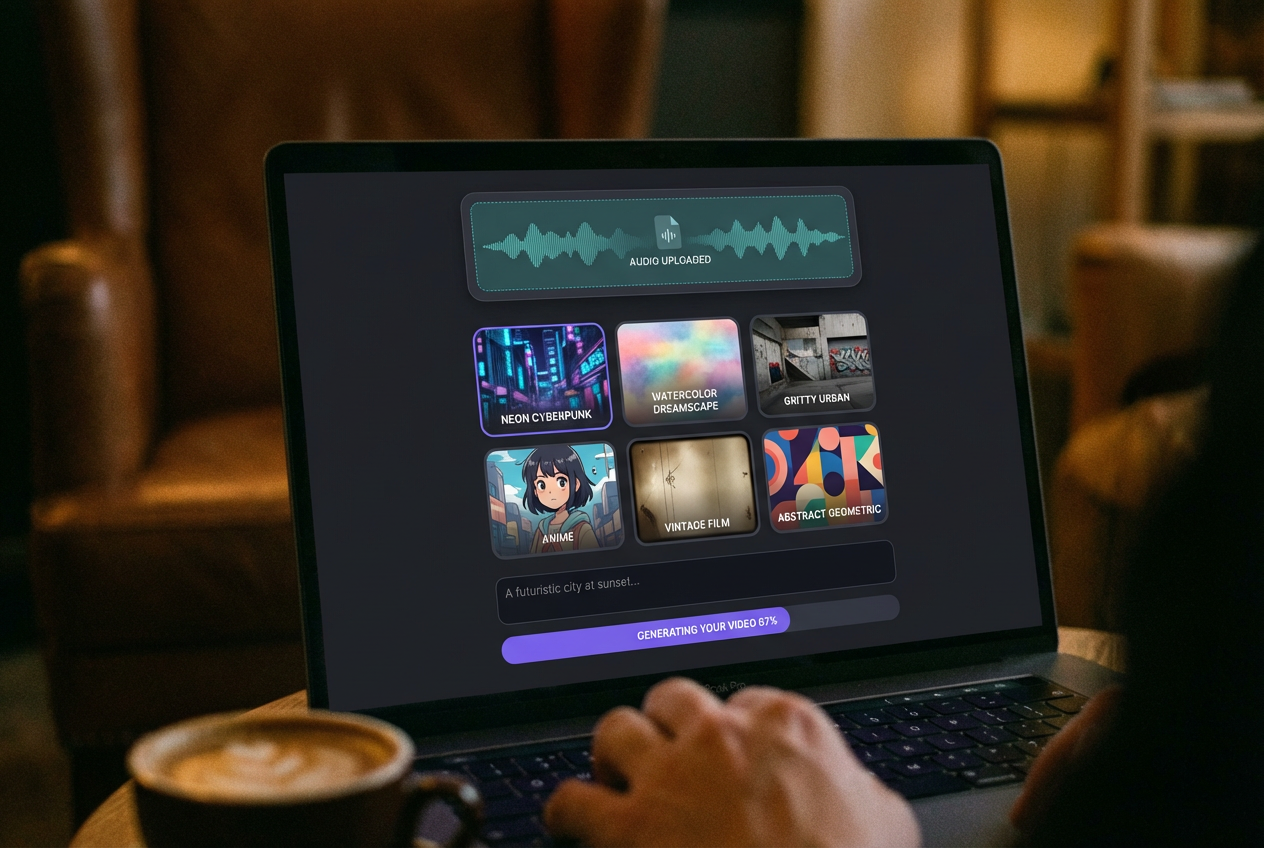
Head to app.onemoreshot.ai and create an account if you haven’t already. Upload or select your song, then pick a video style and mood.
You can drag and drop your audio file, or paste a link from Suno, Udio, or YouTube. Most music videos are generated in just 2–5 minutes, depending on the length of your track and the complexity of the visuals you choose.
4b. Choose Your Style
From hyper-realistic to abstract, cinematic to animated — you can bring your vision to life. Browse through the available styles and select the one that matches your creative direction from Step 3.
4c. Set Your Preferences
This is where you describe what you want. Enter your prompt using the SMEC formula from the previous step. The more specific you are, the better your results.
4d. Generate
Hit the generate button and let the AI work. OneMoreShot generates stunning music videos in under 5 minutes. The AI processes your track and creates synchronized visuals instantly.
Project Mode (Full Creative Control)
For those who want to direct every scene, Project Mode is where the magic happens.
4e. Create a New Project
In Project Mode, you build your video scene by scene in the editor, with full creative control over every clip, transition, and effect.
4f. Map Scenes to Your Song
Use the visual map you created in Step 2 to plan your scenes:
| Timestamp | Section | Scene Description |
|---|---|---|
| 0:00–0:15 | Intro | Wide establishing shot of misty mountains |
| 0:16–0:45 | Verse 1 | Close-up of figure walking through forest |
| 0:46–1:10 | Chorus | Dynamic aerial shot over mountain lake |
| 1:11–1:40 | Verse 2 | Interior cabin scene, warm candlelight |
| 1:41–2:10 | Chorus 2 | Same lake, now at golden hour, more energy |
| 2:11–2:40 | Bridge | Abstract underwater visuals, dreamlike |
| 2:41–3:15 | Final Chorus | All elements combine, maximum visual energy |
| 3:16–3:30 | Outro | Slow fade, return to opening mountain shot |
4g. Generate Each Scene
Write a detailed prompt for each scene and generate them individually. This gives you the power to regenerate any scene you’re not happy with without affecting the rest.
4h. Add Lip-Sync (Optional)
If your track has vocals and you want a performance element, use OneMoreShot’s Lip-Sync feature. The Lip-Sync 2.0 feature delivers better results than ever.
You can create AI music videos easily with Actors for consistent character appearance throughout your video.
4i. Arrange and Preview
Once all your scenes are generated, arrange them on the timeline. Preview the full video to check:
- Do the visual transitions align with musical transitions?
- Is the overall pacing right?
- Are there any jarring visual inconsistencies between scenes?
💡 Don’t settle for the first generation. The best AI music videos typically go through 2–3 rounds of regeneration on key scenes. You can create different angle variations with one click , making it easy to experiment.
Step 5: Edit and Refine
Your raw AI-generated video is a strong starting point. Here’s how to polish it into something truly special.
Timing Adjustments
The most common issue with AI music videos is visual transitions that don’t quite hit on the beat. Watch your video at least three times:
- First watch: Overall feeling and flow
- Second watch: Focus on transitions — do they hit on musical changes?
- Third watch: Watch on mute — do the visuals tell a cohesive story on their own?
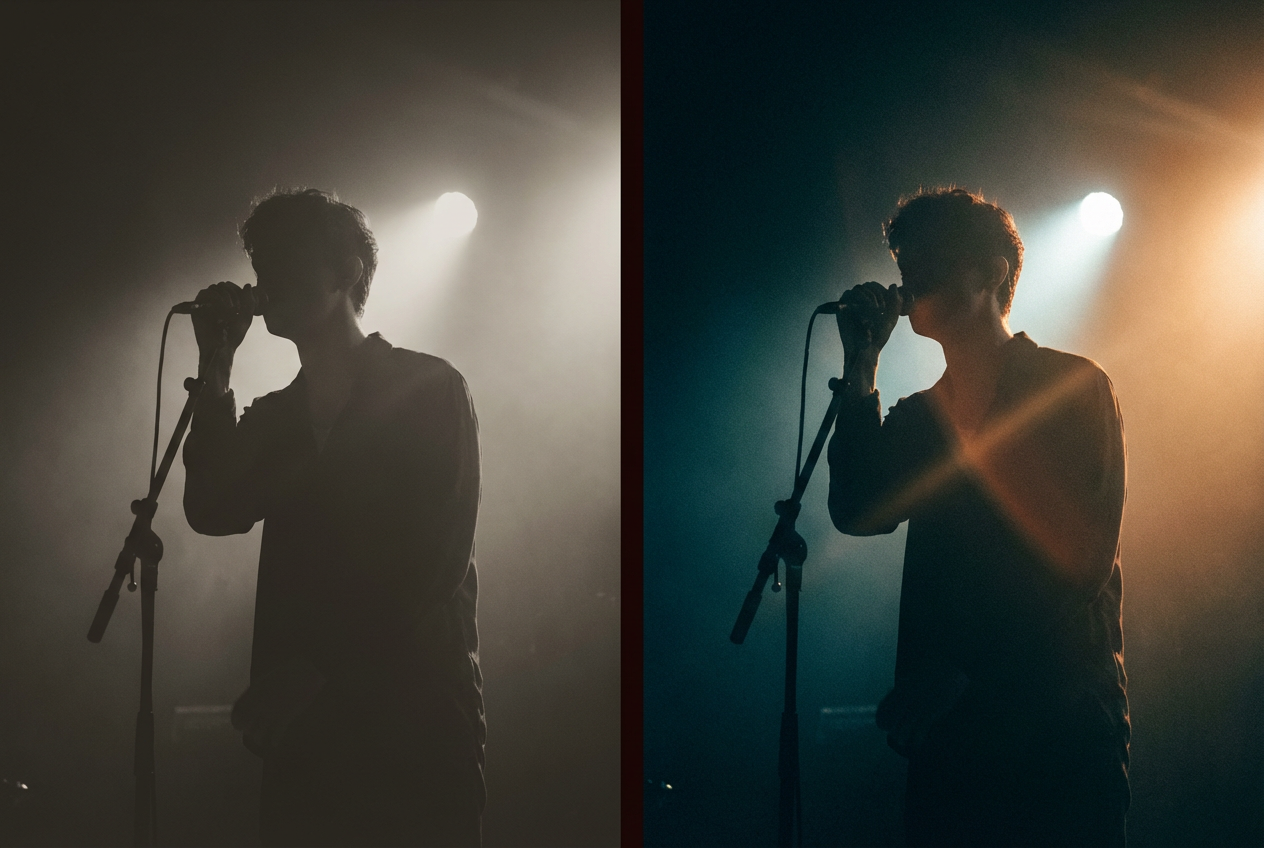
Color Grading
Even great AI visuals can benefit from unified color treatment. If you’re doing any post-processing:
- Match the mood: Warm tones for emotional tracks, cool tones for melancholy, saturated for energy
- Stay consistent: All scenes should feel like they belong in the same video
- Don’t over-process: Subtle adjustments beat heavy filters every time
Adding Text and Overlays
Consider adding:
- Artist name and track title — usually at the beginning
- Lyric overlays — if you’re making a lyric video
- Social media handles — especially for promotional clips
- A call to action — “Stream on Spotify” at the end
For dedicated lyric videos, OneMoreShot also offers an AI Lyric Video Maker that creates animated text, stunning visuals, and perfect music synchronization.
Step 6: Export and Distribute
You’ve got a finished video. Now let’s get it onto every platform where your fans are waiting.
Platform-by-Platform Export Settings
Each platform has specific requirements. Here’s your complete reference:
YouTube (Full Music Video)
The recommended settings are MP4 format (H.264 codec), 1080p resolution (1920×1080), 16:9 aspect ratio, 8–12 Mbps bitrate, AAC audio, and 30–60 fps depending on your footage.
| Setting | Recommended |
|---|---|
| Resolution | 1920×1080 (1080p) or 3840×2160 (4K) |
| Aspect Ratio | 16:9 |
| Format | MP4 (H.264) |
| Frame Rate | 30 fps |
| Bitrate | 8–12 Mbps (1080p) / 35–68 Mbps (4K) |
| Audio | AAC, 48 kHz, stereo |
🎬 Higher bitrate and resolution improve quality, but YouTube re-compresses videos. Uploading at higher settings (like 4K or 2K) ensures better playback quality after compression.
TikTok
TikTok video dimensions are 1080×1920px (9:16), with support for up to 10 minutes for most users and a 2GB max file size.
| Setting | Recommended |
|---|---|
| Resolution | 1080×1920 |
| Aspect Ratio | 9:16 (vertical) |
| Format | MP4 |
| Duration | 15–60 seconds for best engagement |
| Frame Rate | 30 fps |
Export at 1080p as TikTok will compress 4K uploads anyway.
The platform’s algorithm favors engaging content between 21–34 seconds.
Instagram Reels
Instagram Reels work best at 1080 x 1920 pixels (9:16 aspect ratio) for vertical format.
| Setting | Recommended |
|---|---|
| Resolution | 1080×1920 |
| Aspect Ratio | 9:16 |
| Format | MP4 (H.264) |
| Duration | Up to 90 seconds |
| Bitrate | 5–8 Mbps |
Instagram compresses videos heavily, so start with the best quality possible.
YouTube Shorts
YouTube Shorts use 9:16 at 1080 × 1920. Keep them under 60 seconds and make sure your hook happens in the first 2 seconds.
Spotify Canvas
This one’s different from the others. Spotify Canvas isn’t a full music video — it’s a short visual loop that plays behind your track in the Spotify app.
Spotify Canvas requirements: Aspect Ratio 9:16 (vertical), Length 3–8 seconds (looped), Resolution minimum height of 720px (recommended 1080 × 1920 for optimal quality), File Format MP4, exported at 24–30 fps.
Important content guidelines to remember:
Do not use videos with visible singing, rapping, or talking, as the Canvas loop is not synced to the audio. Avoid intense flashing, strobe effects, or rapid cuts.
Use smooth, seamless loops that feel natural when repeating.
💡 Create a dedicated Canvas clip: Take a 5-second segment from your video that loops well, or generate a separate abstract/atmospheric clip specifically for Canvas.
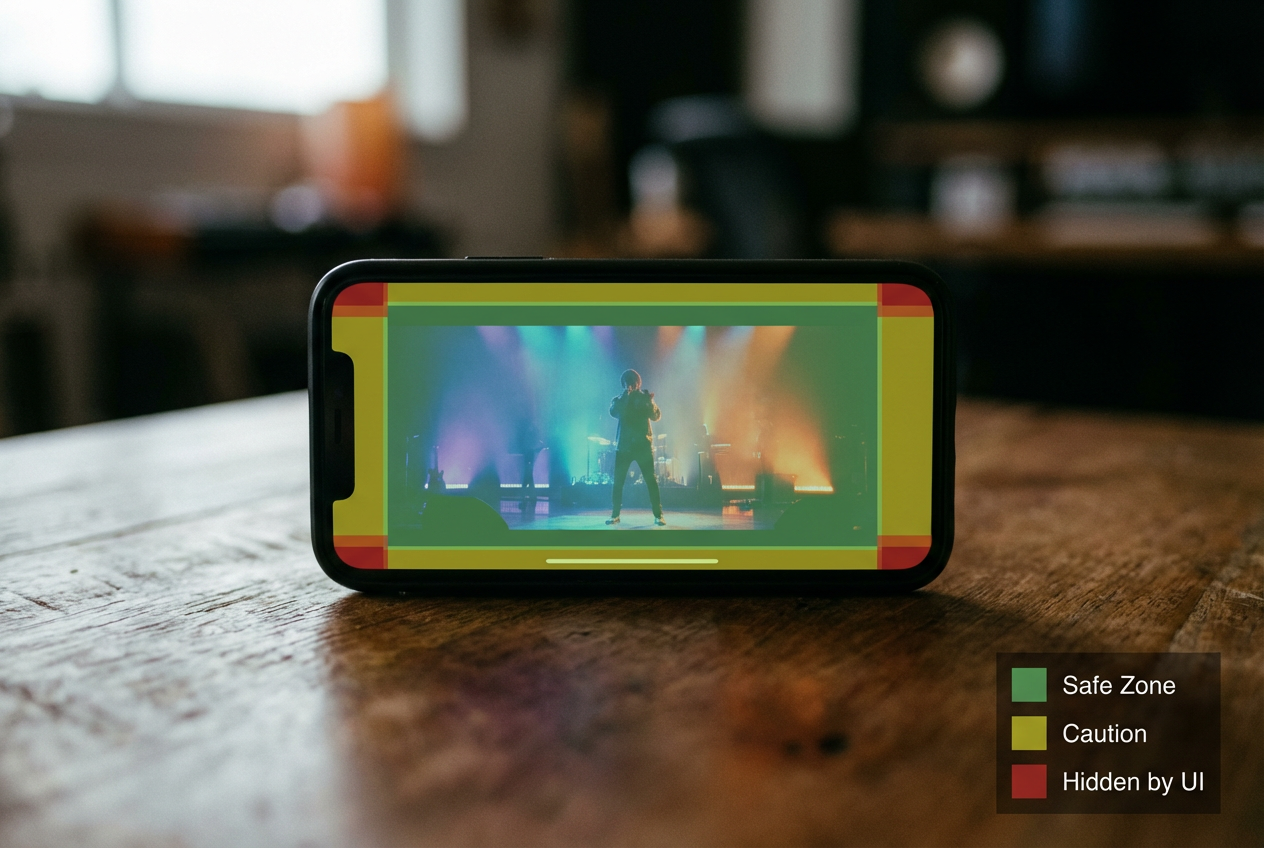
Cross-Platform Safe Zones
If you’re posting the same vertical video to multiple platforms, be mindful of safe zones. The overlap of all safe zones across TikTok, Instagram Reels, YouTube Shorts, and Facebook Reels is approximately 900 x 1400 pixels, centered in the 1080 x 1920 frame.
Keep all text, titles, and important visual elements within that center zone to ensure nothing gets hidden behind platform UI elements.
Pro Tips for Dramatically Better Results
These techniques separate good AI music videos from great ones.
1. Generate at the Highest Quality Available
It’s tempting to use faster, lower-quality generation to save time or tokens. Don’t. Always generate at the highest quality your plan allows. You can’t add quality back later.
2. Use Scene-by-Scene Generation for Important Releases
Quick Generate is perfect for social media clips and rapid content creation. But for your official music video — the one going on YouTube with your name on it — use Project Mode and craft each scene intentionally.
3. Match Visual Energy to Musical Energy
This sounds obvious, but it’s the #1 thing beginners get wrong. Your verse should feel visually different from your chorus. The bridge should feel different from both. Map your visual intensity to your musical intensity.
4. Maintain Visual Consistency
AI can generate wildly different looks from scene to scene. To keep your video cohesive:
- Use the same style/model settings for all scenes
- Include consistent color palette mentions in every prompt (e.g., “teal and orange color grading”)
Use Actors in OneMoreShot for character consistency across multiple scenes
5. Create Multiple Versions
From one full-length video, create:
- Full video (16:9) for YouTube
- Vertical cut (9:16) for TikTok, Reels, and Shorts
- 30-second teaser for pre-release promotion
- Spotify Canvas loop (3–8 seconds) from the most visually striking moment
- Square clip (1:1) for Twitter/X and Facebook feed
6. Time Your Scene Changes to Musical Changes
The most professional-looking AI music videos change scenes on the beat — specifically on musical transitions like verse-to-chorus or during drum fills. This creates a subconscious feeling of intentionality that viewers register even if they can’t articulate it.
7. Don’t Overdo It
More effects ≠ better video. Some of the most impactful AI music videos use a restrained visual palette. A consistent mood held for 3 minutes beats a visual circus every time.
8. Repurpose Strategically
With short-form video platforms like TikTok, Instagram Reels, and YouTube Shorts dominating the digital landscape, AI music videos have emerged as a core part of social media content creation. These intelligently generated videos help creators blend original sounds, custom music, and stylized visuals without needing expensive production setups.
Create once, distribute everywhere. Every full music video should be cut into at least 3–5 shorter clips for social platforms.
Common Mistakes to Avoid
Learn from others’ mistakes so you don’t have to make them yourself.
❌ Mistake 1: Vague Prompts
Bad: “A cool music video with effects” Good: “A lone astronaut floating through a nebula, surrounded by swirling purple and gold cosmic dust. Stars glitter in the distance. Slow, graceful rotation. Wide cinematic shot.”
Specific prompts produce specific (and better) results. Every time.
❌ Mistake 2: Ignoring Audio Quality
If your audio is poorly mixed or has clipping, the AI’s beat detection suffers. Clean audio → better sync → better video.
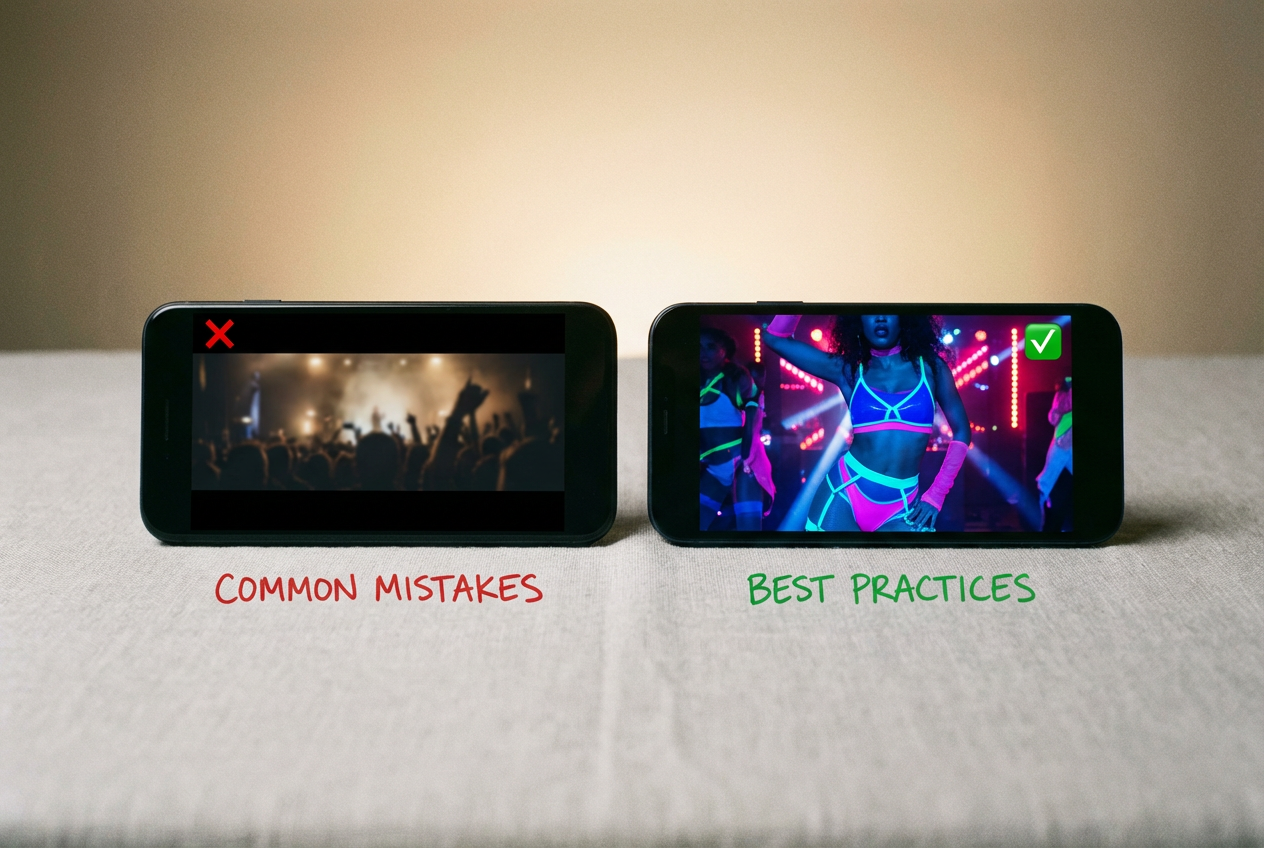
❌ Mistake 3: Wrong Aspect Ratio for the Platform
Uploading horizontal video to vertical platforms like TikTok and Reels will cause them to letterbox it with huge black bars. The algorithm treats this as low-quality content and limits distribution.
Always export in the native format for each platform.
❌ Mistake 4: No Visual Planning
Jumping straight into generation without a creative direction leads to disjointed videos. The 5 minutes you spend on visual planning in Step 3 saves you 30 minutes of regeneration later.
❌ Mistake 5: Settling for the First Generation
AI generation has an element of randomness. Your first result might be amazing — or it might be mediocre. Don’t be afraid to regenerate scenes that don’t meet your standards. The best AI music videos typically involve 2–3 iterations on key moments.
❌ Mistake 6: Forgetting the Spotify Canvas
Many artists release a music video but forget about Spotify Canvas entirely. Spotify reports that tracks with Canvas are 5% more likely to keep playing, 20% more likely to be added to a playlist, and 9% more likely to lead to a visit to the artist’s page. That’s free engagement you’re leaving on the table.
❌ Mistake 7: Not Including Metadata
When uploading to YouTube, fill out everything: title, description, tags, chapters, and custom thumbnail. Your AI music video won’t find its audience if it’s not properly optimized for search.
Your Complete AI Music Video Workflow — Summary
Here’s your creation process at a glance:
| Step | Action | Time |
|---|---|---|
| 1 | Choose your tool (OneMoreShot.ai) | 2 min |
| 2 | Analyze BPM, map visual moments | 5 min |
| 3 | Define style, gather references, write prompts | 10 min |
| 4 | Upload track and generate video | 5–15 min |
| 5 | Review, refine, regenerate key scenes | 10–20 min |
| 6 | Export for each platform | 5 min |
| Total | ~30–60 min |
Compare that to the traditional music video process: weeks of pre-production, days of shooting, weeks of editing, and thousands of dollars in costs. Creating a high-quality music video has traditionally been an expensive and time-consuming process, requiring professional videographers, editors, and expensive production equipment. However, with AI-powered music video generators, artists can now generate stunning, high-quality visuals for their songs without breaking the bank.
Next Steps
You’ve now got everything you need to create your first AI music video. Here’s where to go from here:
🎬 Create your first video now → — Upload your track and start generating in minutes.
📚 Go deeper with our guides:
- The Complete Guide to AI Music Videos in 2026 — A broader exploration of the AI music video landscape, tools, and creative possibilities
🎵 Genre-specific techniques: Different genres demand different visual approaches. Hip-hop videos need confident, stylized performance shots. EDM tracks thrive with abstract, beat-reactive visuals. Indie folk benefits from atmospheric, narrative-driven storytelling. Experiment with the approaches outlined above and find what resonates with your sound.
The barrier between having a great song and having a great music video has never been lower. Your track deserves visuals. Now you know exactly how to create them.
Go make something amazing. 🎥